Motivation
Today a lot of people (including possible clients) will first and foremost see your work online in some sort of a web gallery on your own personal website or social media like Facebook, Google+ or 500px. Therefore the resized web versions of your photos should be presented at their best.
Over the years I've tried lots of different methods and I am now using a combination of various techniques in order to get the best results possible. There are quite a few steps to do but you don't have to do them manually for each photo. I've built an Photoshop action set you can download and use for free. It's a largely automated resize and sharpen process with only little manual adjustments on each photo. For me, this sharpening technique reveals details of an image more clearly (than other methods like Unsharp Mask) and is the final step for a successful image post-processing.
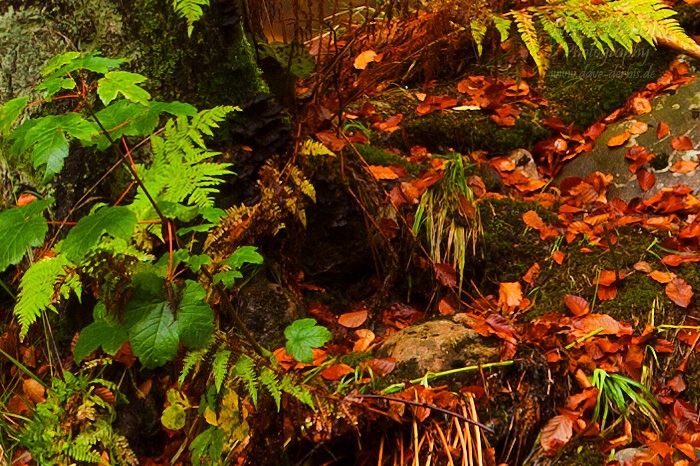
For a better illustration I've attached two versions of the image "Autumn Beauty" below.
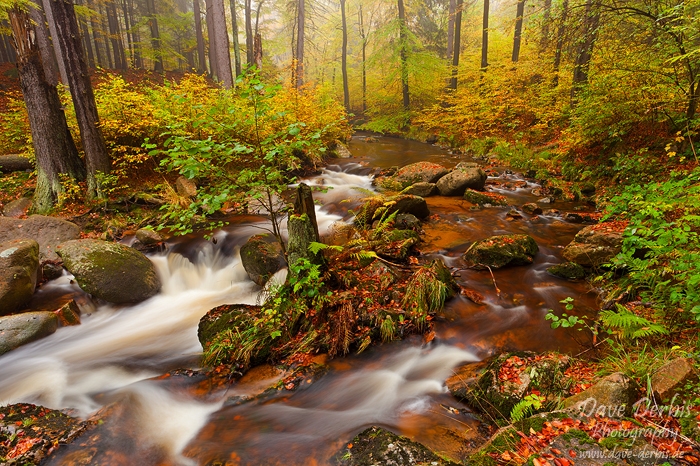
Sharpened Example File - Autumn Beauty - Prints Available
The photo above is sharpened (+final colour and curves adjustments), the photo below is only resized without any sharpening. Hopefully you can see at least a small difference.
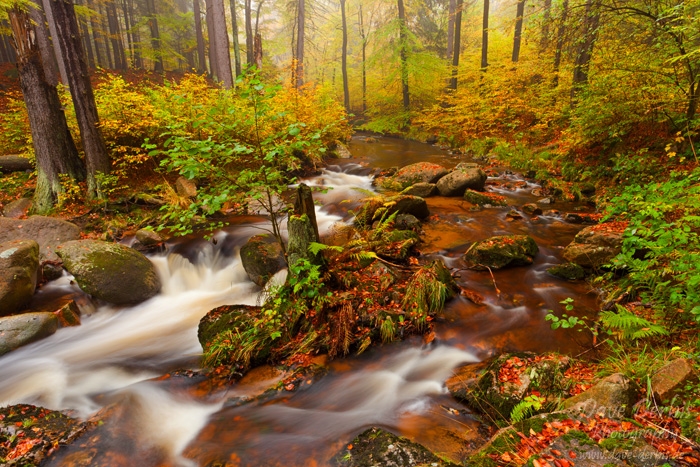
Not Sharpened Example File
Sharpening for Web
In order to simplify the necessary steps to create an optimal web-presentaion version of a photo I have produced an action set. I created the actions in Photoshop CS5 but it should be compatible with most other versions as well. To minimize the hassle with the resize and sharpen process for web just load the action set into your Photoshops action palette and press play. I recommend to assign special keys for the actions. For example for creating a landscape web-version of a photo I just have to press F2 in Photoshop and adjust the three layers for the final colour and curves adjustments and customize the visibility of the last sharpening layer to my taste. (Forest scenes for instance often need less sharpening than a mountain scene.)
Here are some technical details of each step of the action:
- resize (1.6666 x final photo size in pixel (long side), e.g. 1.6666 x 700px = 1166px)
- sharpen
- new layer copy
- sharpen
- resize to final image size (700px)
- selective sharpening (Strength: 80%, Radius: 0,2 Pixel)
- curves layer (Output: 121, Input: 125)
- hue / saturation layer (saturation: +8)
After running the action on your full size image I recommend to adjust the visibility of those last final three adjustment layers (saturation, curves, sharpening) for each image to your taste. On some images I paint on the layer masks to do some selective sharpening on different areas of the image to remove or reduce halos around high contrast edges or to smoothen some areas of a photo. This last step highly depends on the photos subject and your personal taste. Finally flatten the image and Save for web (I suggest a jpg compression level of 60-80% for fast loading in combination with a hardly noticeable compression).
As said above the idea is not my own, but I've adapted and changed whole parts and nuances quite a bit to my taste. It is a mix of various methods from other photographers that emerged over the years based on my experience.
Sharpening for Prints / Licensing:
If you produce prints for clients or offer your image files for licensing you should also do (some) sharpening on the full size photos so that they look highly detailed on close inspection. Of course the sharpening amount depends on the photos print size and / or viewing distance. (Some licensing clients may want an unsharpened version so they can sharpen the image for their desired sizes. So best ask the customer what he wants before delivering a highly sharpened file.)
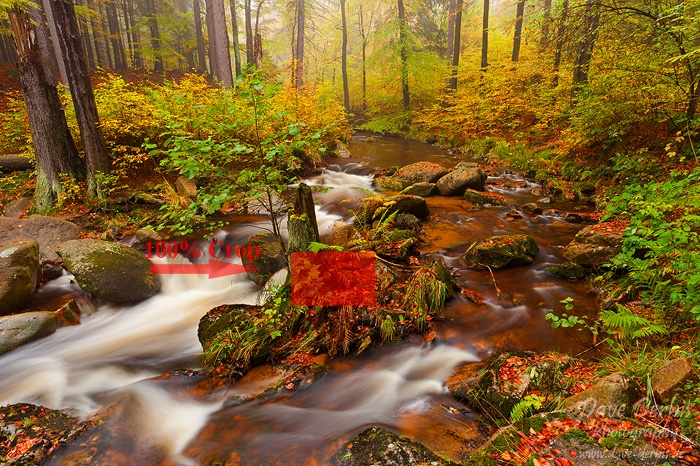
The two files below show a 100% crop of the red area shown above
The actions to sharpen a full size image only have three simple steps in Photoshop:
- make a copy of the background layer
- sharpen
- adjust visibility of the sharpen layer (+flatten)
There is also a more advanced version (with colour and curves adjustment layers) available in the action set but since there is no noticable lack of colour or contrast when sharpening for full size images I tend to use the simple version for those files.
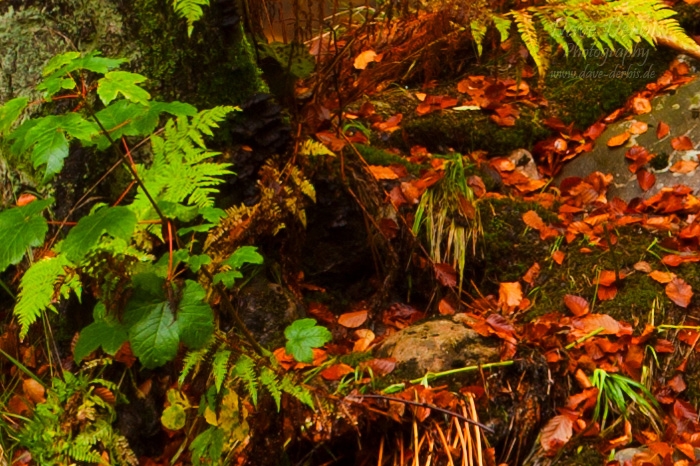
100 percent crop Canon 5D MkII + Canon L lens - not sharpened
The photo above is not sharpened, the photo below is sharpend with only 30% visibility.
100 percent crop Canon 5D MkII + Canon L lens - sharpened
Download
The action set includes four Photoshop sharpen actions for the formats 700px landscape, 600px portait as well as one simple and one more advanced action for original size images.
To create new action sets for other output sizes you just have to copy a specific action and edit the first resize step of the action to 1.6666 x FINAL-OUTPUT-SIZE (long side) in px = Foobar px. That's it.
If you're downloading and using the actions it would be great if you could link back to this page to help other people find it.
Download: Photoshop Actionset - Sharpen (5,4KB *.atn file)
Feel free to leave a comment or ask a question in the comments below.
Finally you may be also interested in the seven essential elements of stunning landscape photos article.
Permalink: www.dave-derbis.de/article/sharpen-photos-for-web-and-prints/
